
Remote Fileshare — AI skill for Claude Code
Remote file sharing between your browser and a server — upload, download, preview, folder tar.gz, resumable.
How to install Remote Fileshare
This entry records only its repository, not the path inside it, so there is no
exact command to give. Open chao5go/remote-fileshare and copy the folder into
~/.claude/skills/, or the file into ~/.claude/agents/.
What Remote Fileshare does
Remote file sharing between your browser and a server — upload, download, preview, folder tar.gz, resumable. Built for remote AI agents. npx / uvx remote-fileshare, zero dependencies. 远程文件共享:浏览器与服务器之间传文件,一行 npx / uvx 启动,Node 与 Python 零依赖,专为远程 AI agent 设计。
Alternatives in AI
- Project Next 14 AI Prompt Sharing — Next.js recently became the official React framework as outlined in React docs 3k ★
- Kimi Cc — Use Kimi's latest model (kimi-k2-0711-preview) to drive Claude Code 1.7k ★
- Llmwiki — Open Source Implementation of Karpathy's LLM Wiki 1.5k ★
README
remote-fileshare · 远程文件共享
[](https://www.npmjs.com/package/remote-fileshare) [](https://pypi.org/project/remote-fileshare/) [](https://github.com/chao5go/remote-fileshare/actions/workflows/ci.yml) [](https://github.com/chao5go/remote-fileshare/blob/main/LICENSE)
**在浏览器和远程服务器之间传文件。** 一行命令在服务器上启动,打开网页就能上传、下载、管理文件。不用装 FTP,不用配 scp,也不用折腾 VS Code 插件。
适合这样的场景:你在本地电脑上通过 Claude Code、Codex、opencode 等 **AI agent** 远程操作一台服务器,需要把图片、文档、整个文件夹传给 agent 处理,或者把 agent 生成的结果拿回本地。
⚠️ **特别提醒**:服务器在境外时,直接在 VS Code / 终端里拖拽上传大文件会很慢,还容易中断。传大文件、整个文件夹,建议用 remote-fileshare 的网页上传:浏览器直连服务器,带进度、速度和剩余时间,体验好很多。
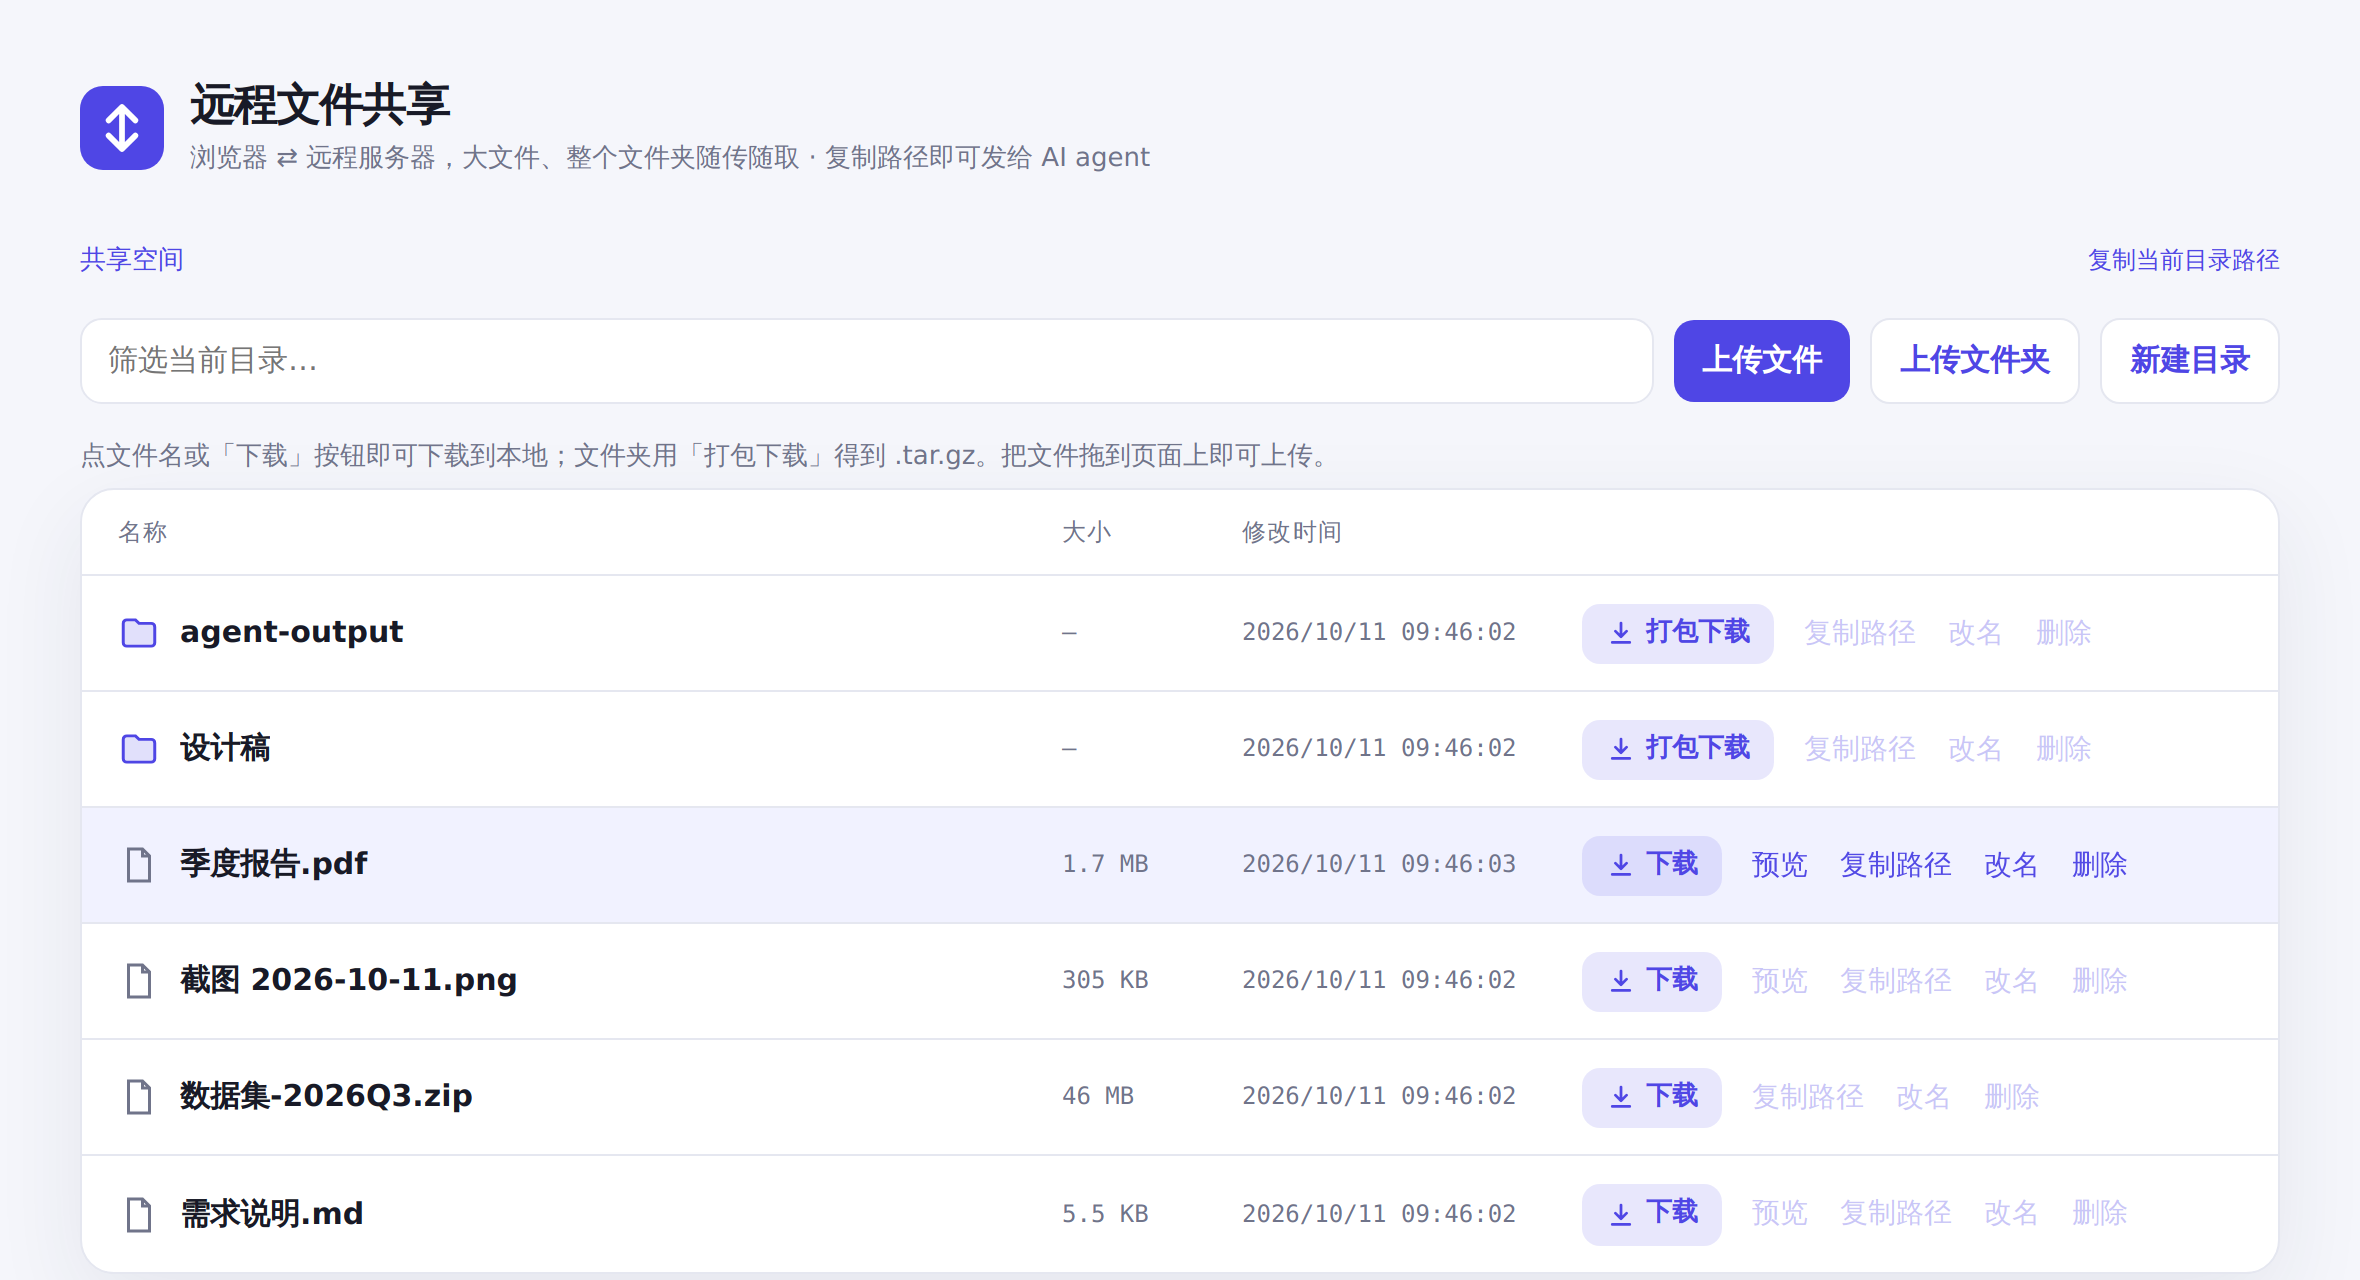
安装与启动
在**远程服务器**上运行下面任意一种,有 Node.js 或 Python 其中一个就够了:
npx remote-fileshare /path/to/share        # Node.js 18+
uvx remote-fileshare /path/to/share        # Python 3.8+,用 uv
pipx run remote-fileshare /path/to/share   # Python 3.8+,用 pipx
不传目录时共享当前目录,默认端口 8001。启动后会自动查到服务器的外网 IP,连同用户名、密码一起打印出来:
remote-fileshare 已启动:http://0.0.0.0:8001
共享目录:/path/to/share
用户名:admin
密码:fRu_aghQlXQ6cJ1bOpWiw-Te(已随机生成并保存到 ~/.config/remote-fileshare/password)
外网访问:http://203.0.113.10:8001(需要在防火墙 / 安全组放行 8001 端口;加 --https 可自动启用 HTTPS)
在**本地电脑**的浏览器打开「外网访问」那个地址即可。
一键 HTTPS
加上 `--https`,自动获取外网 IP,并自动申请、续期 HTTPS 证书,**不需要域名**:
npx remote-fileshare /path/to/share --https
# 访问地址:https://203.0.113.10:8001
# HTTPS 证书已就绪:https://203.0.113.10:8001
需要两样东西:机器上装有 [Caddy](https://caddyserver.com/docs/install) 2.10 以上版本(程序会自动调用它,没装时会提示),以及放行 **80 端口**(申请证书用)和 8001 端口。证书是 Let's Encrypt 签给 IP 的,有效期约 6 天,Caddy 会自动续期。有域名的话用 `PUBLIC_HOST=你的域名` 指定即可。
其他安装方式``
Related Skills
MCP Filebridge
MCP file transfer prototype: file upload and download between remote MCP clients and servers. Works with Claud


PAI FileShare Skill
This skill lets you send yourself files by letting your AI (Claude Code, PAI, etc) put it in your local Nextcl

Sec Scan File
파일 처리 취약점 진단 — File Upload / Download / LFI / RFI — scan_file_processing.py + LLM 교차검증


Kit Export Project
Export this kit project to the non-terminal Claude surfaces (#376). Flattens CLAUDE.md (+ inlined @.claude/rul


Acp Pro.Github.Io
Unified VSCode Client for AI Agent (Claude, Copilot, Codex, …) with multi-tab sessions and remote sharing.

Tts Init
Install MLX dependencies and download model (~4GB)

Related Agents
Conversion Funnel Analyst
Read-only analyst that pulls funnel metrics (signups → first upload → first download → paid) week-over-week an


Pipeline
Builds a recurring Prefect 3 pipeline for an already-onboarded Data Basis dataset — download, clean, upload (d


Targets
Targets pipeline reviewer. Use when verifying target dependencies are correct, dynamic branching is sound, for
